Connect Unitlify and GetYourGuide
A step-by-step guide for linking a product in your Unitlify dashboard to GetYourGuide and obtaining the Product ID required by the GetYourGuide Supplier Administration.
Before you start
- An active Unitlify account with at least one product.
- A GetYourGuide Supplier account and the Tour ID and Tour Option ID of the product you want to connect.
Step-by-step
- 1
Open Sales Channels in Unitlify
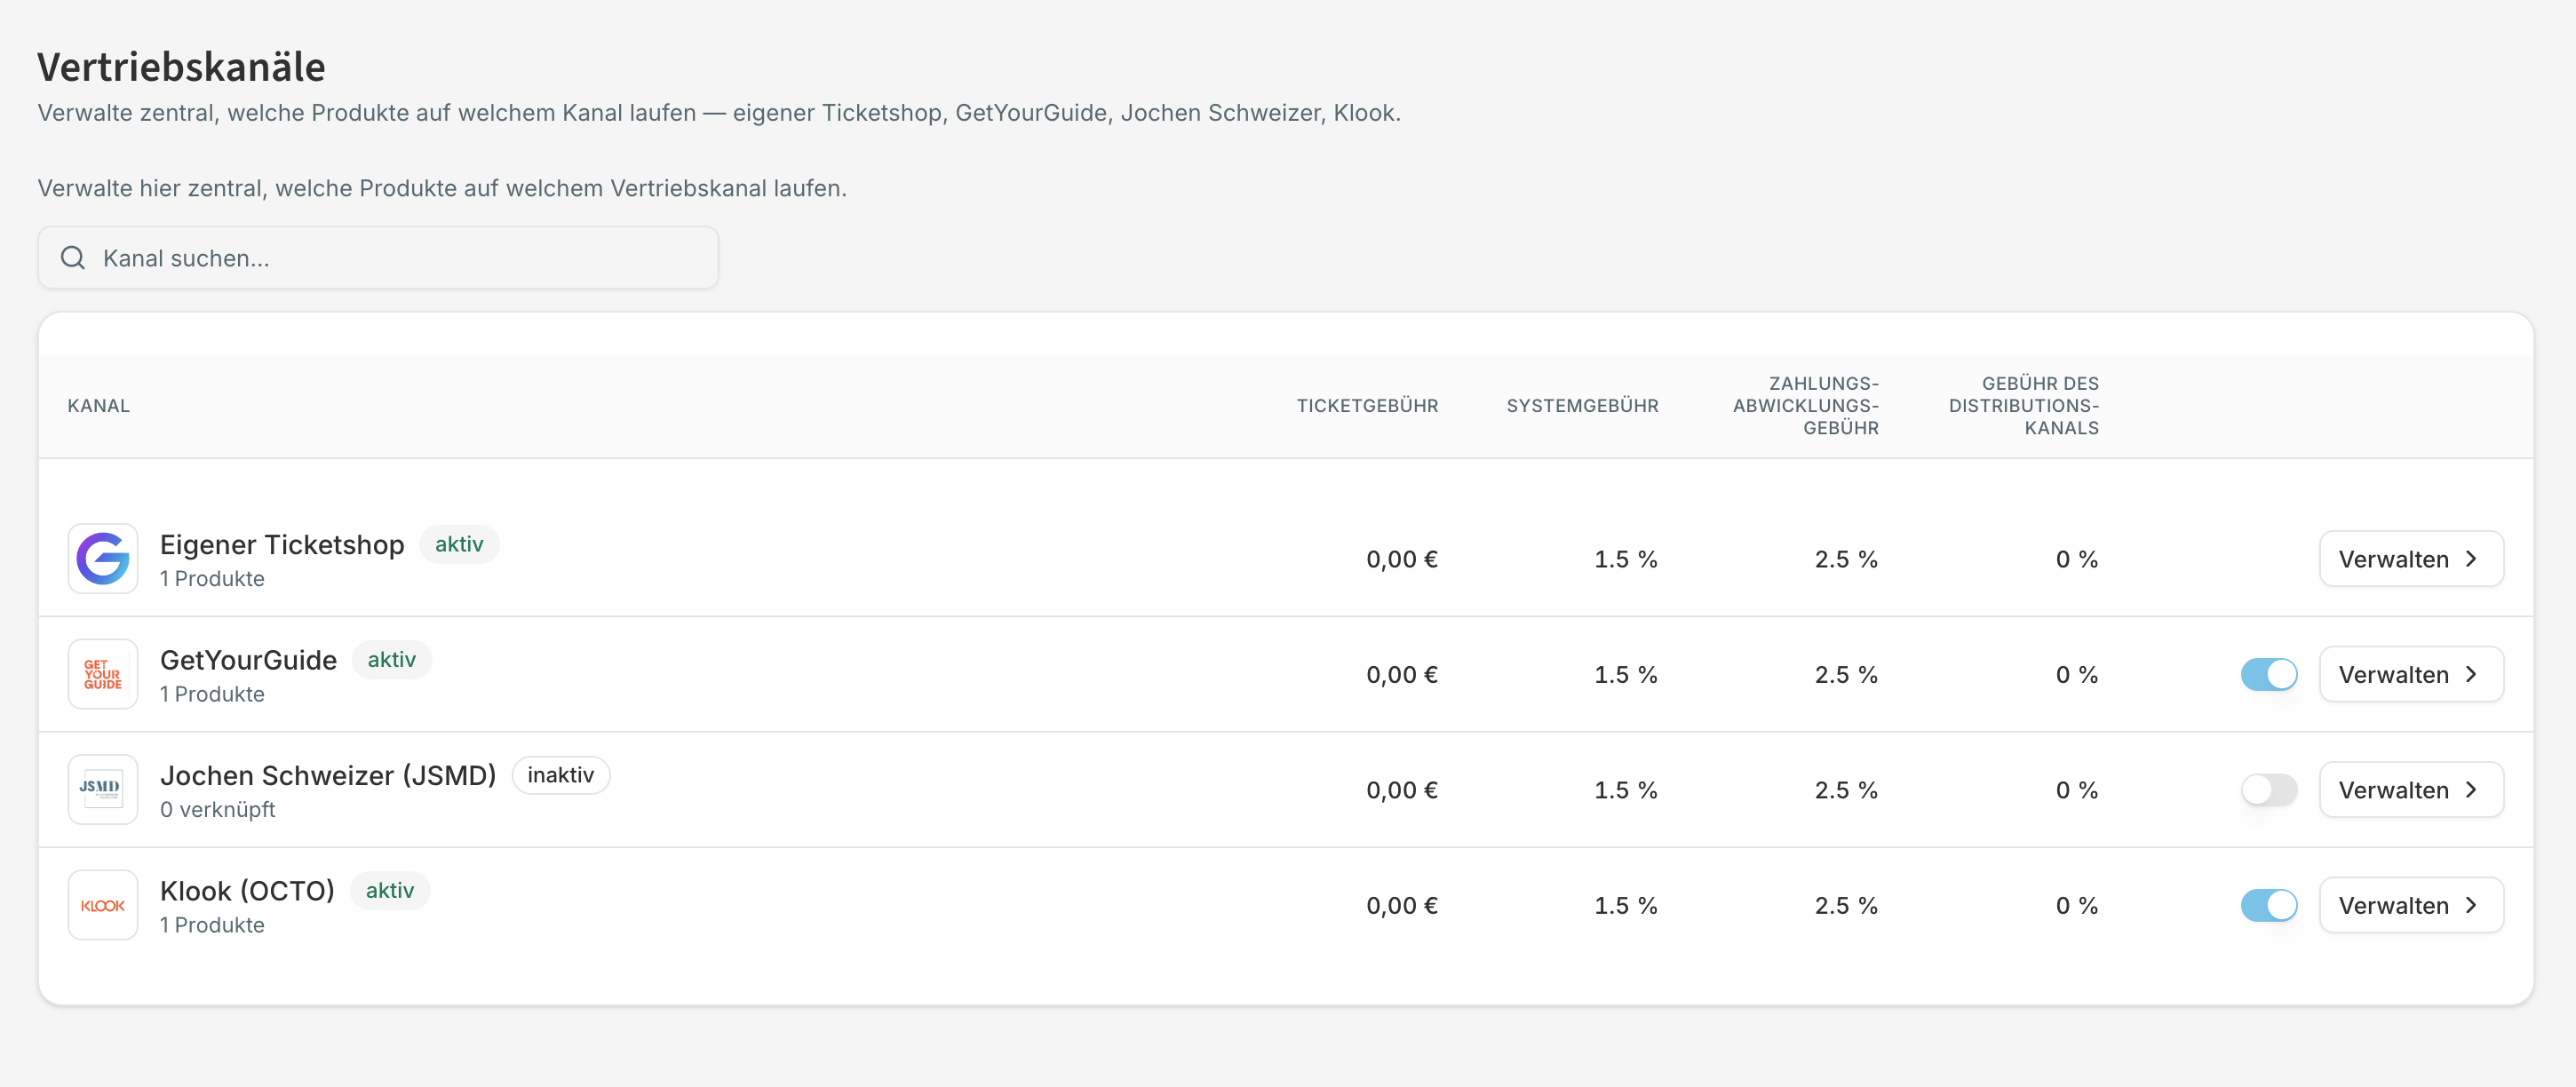
Log in to your Unitlify dashboard and open Buchungssystem → Vertriebskanäle from the sidebar. You'll see a list of all your sales channels.
- 2
Open the GetYourGuide channel
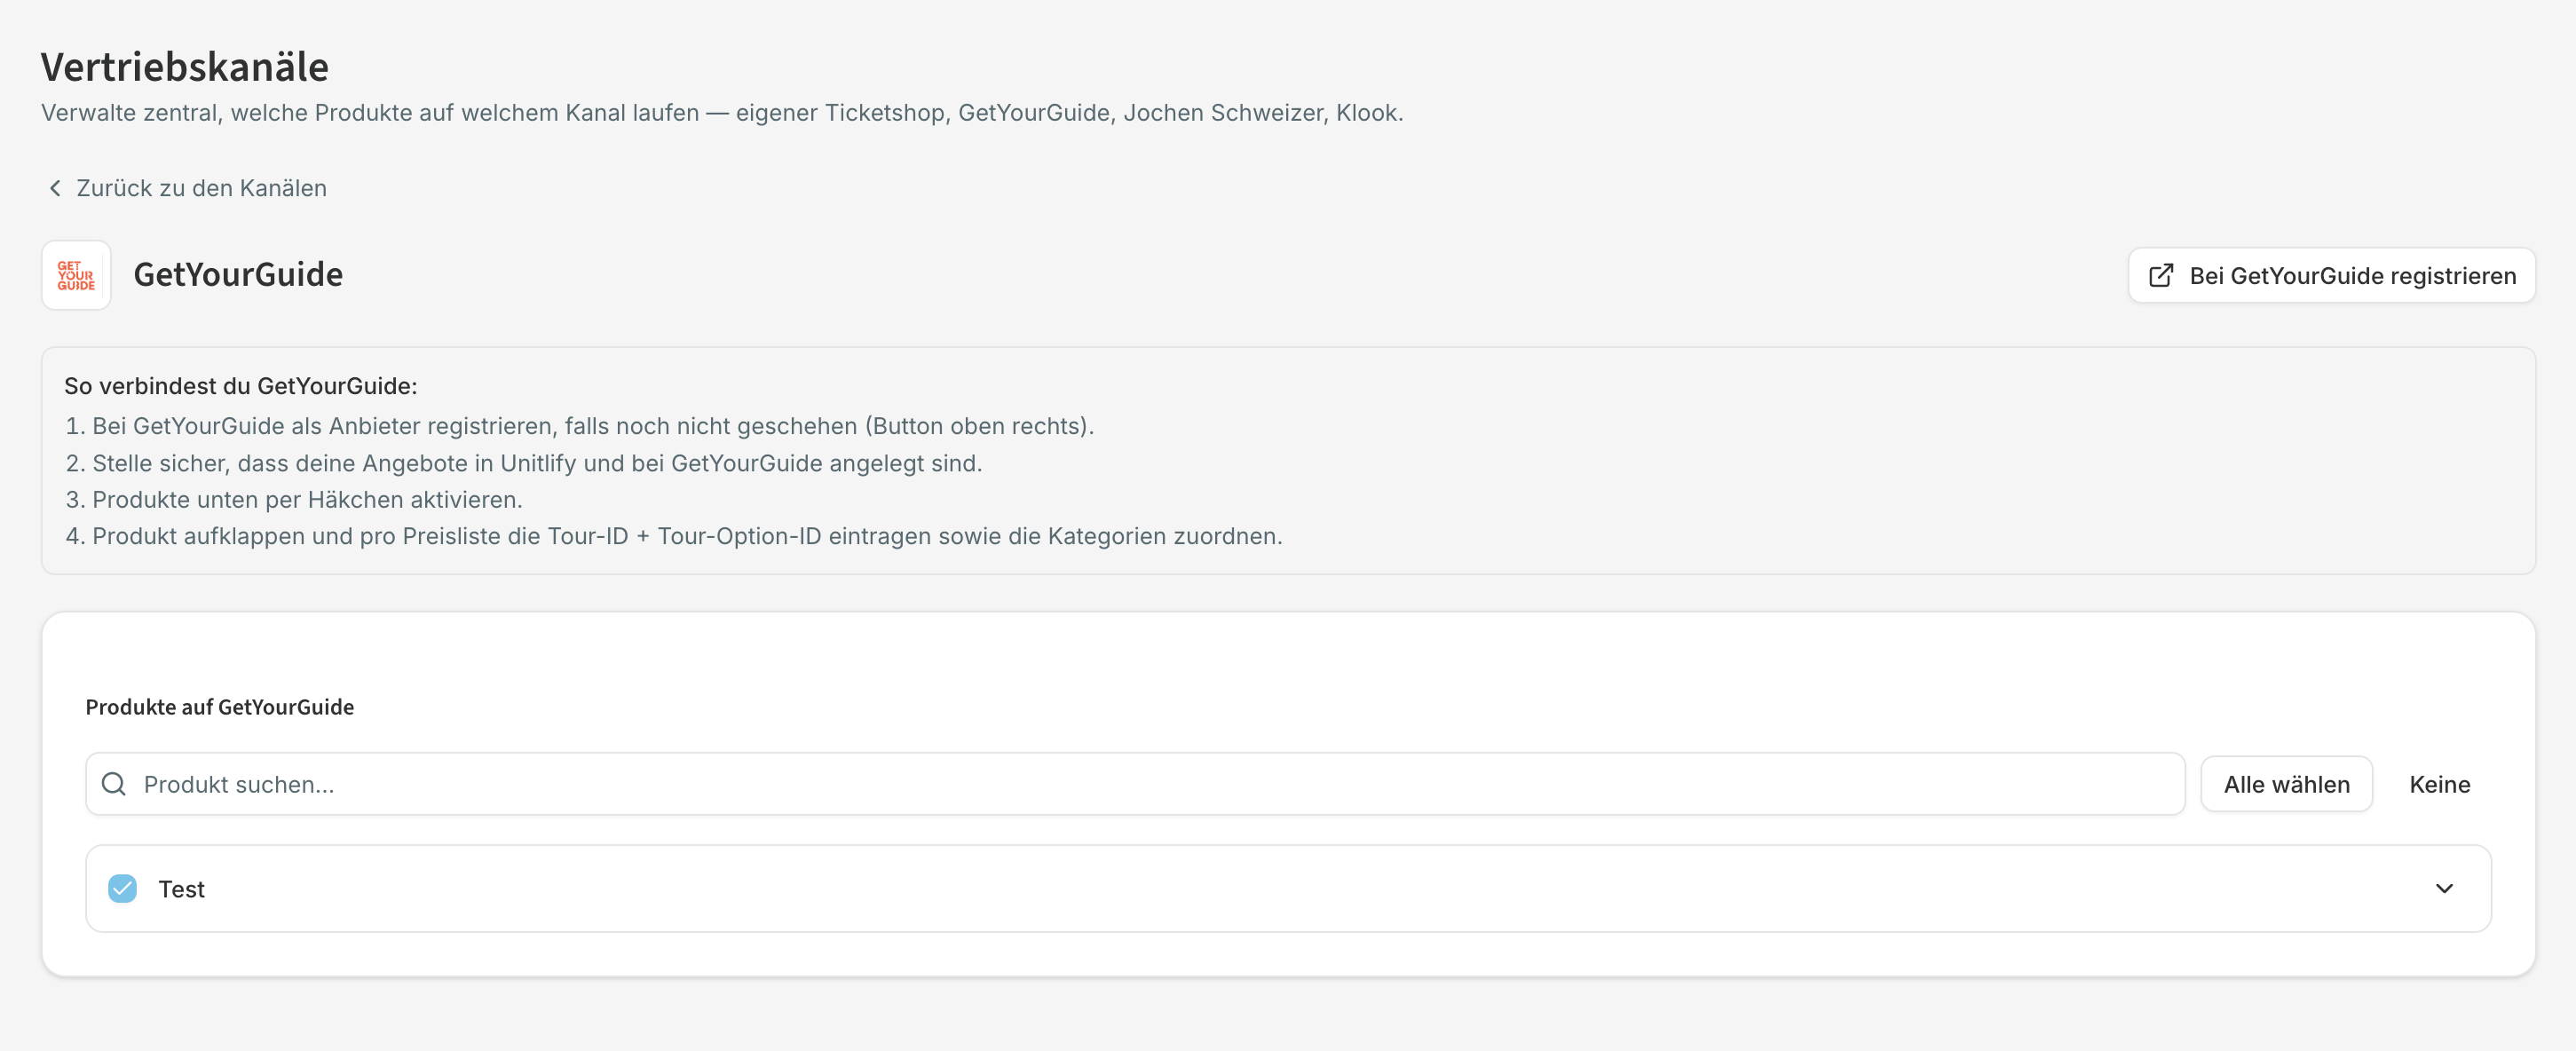
Click Verwalten on the GetYourGuide row. If the channel is inactive, switch it on with the toggle in the overview first.
- 3
Select the products to offer on GetYourGuide
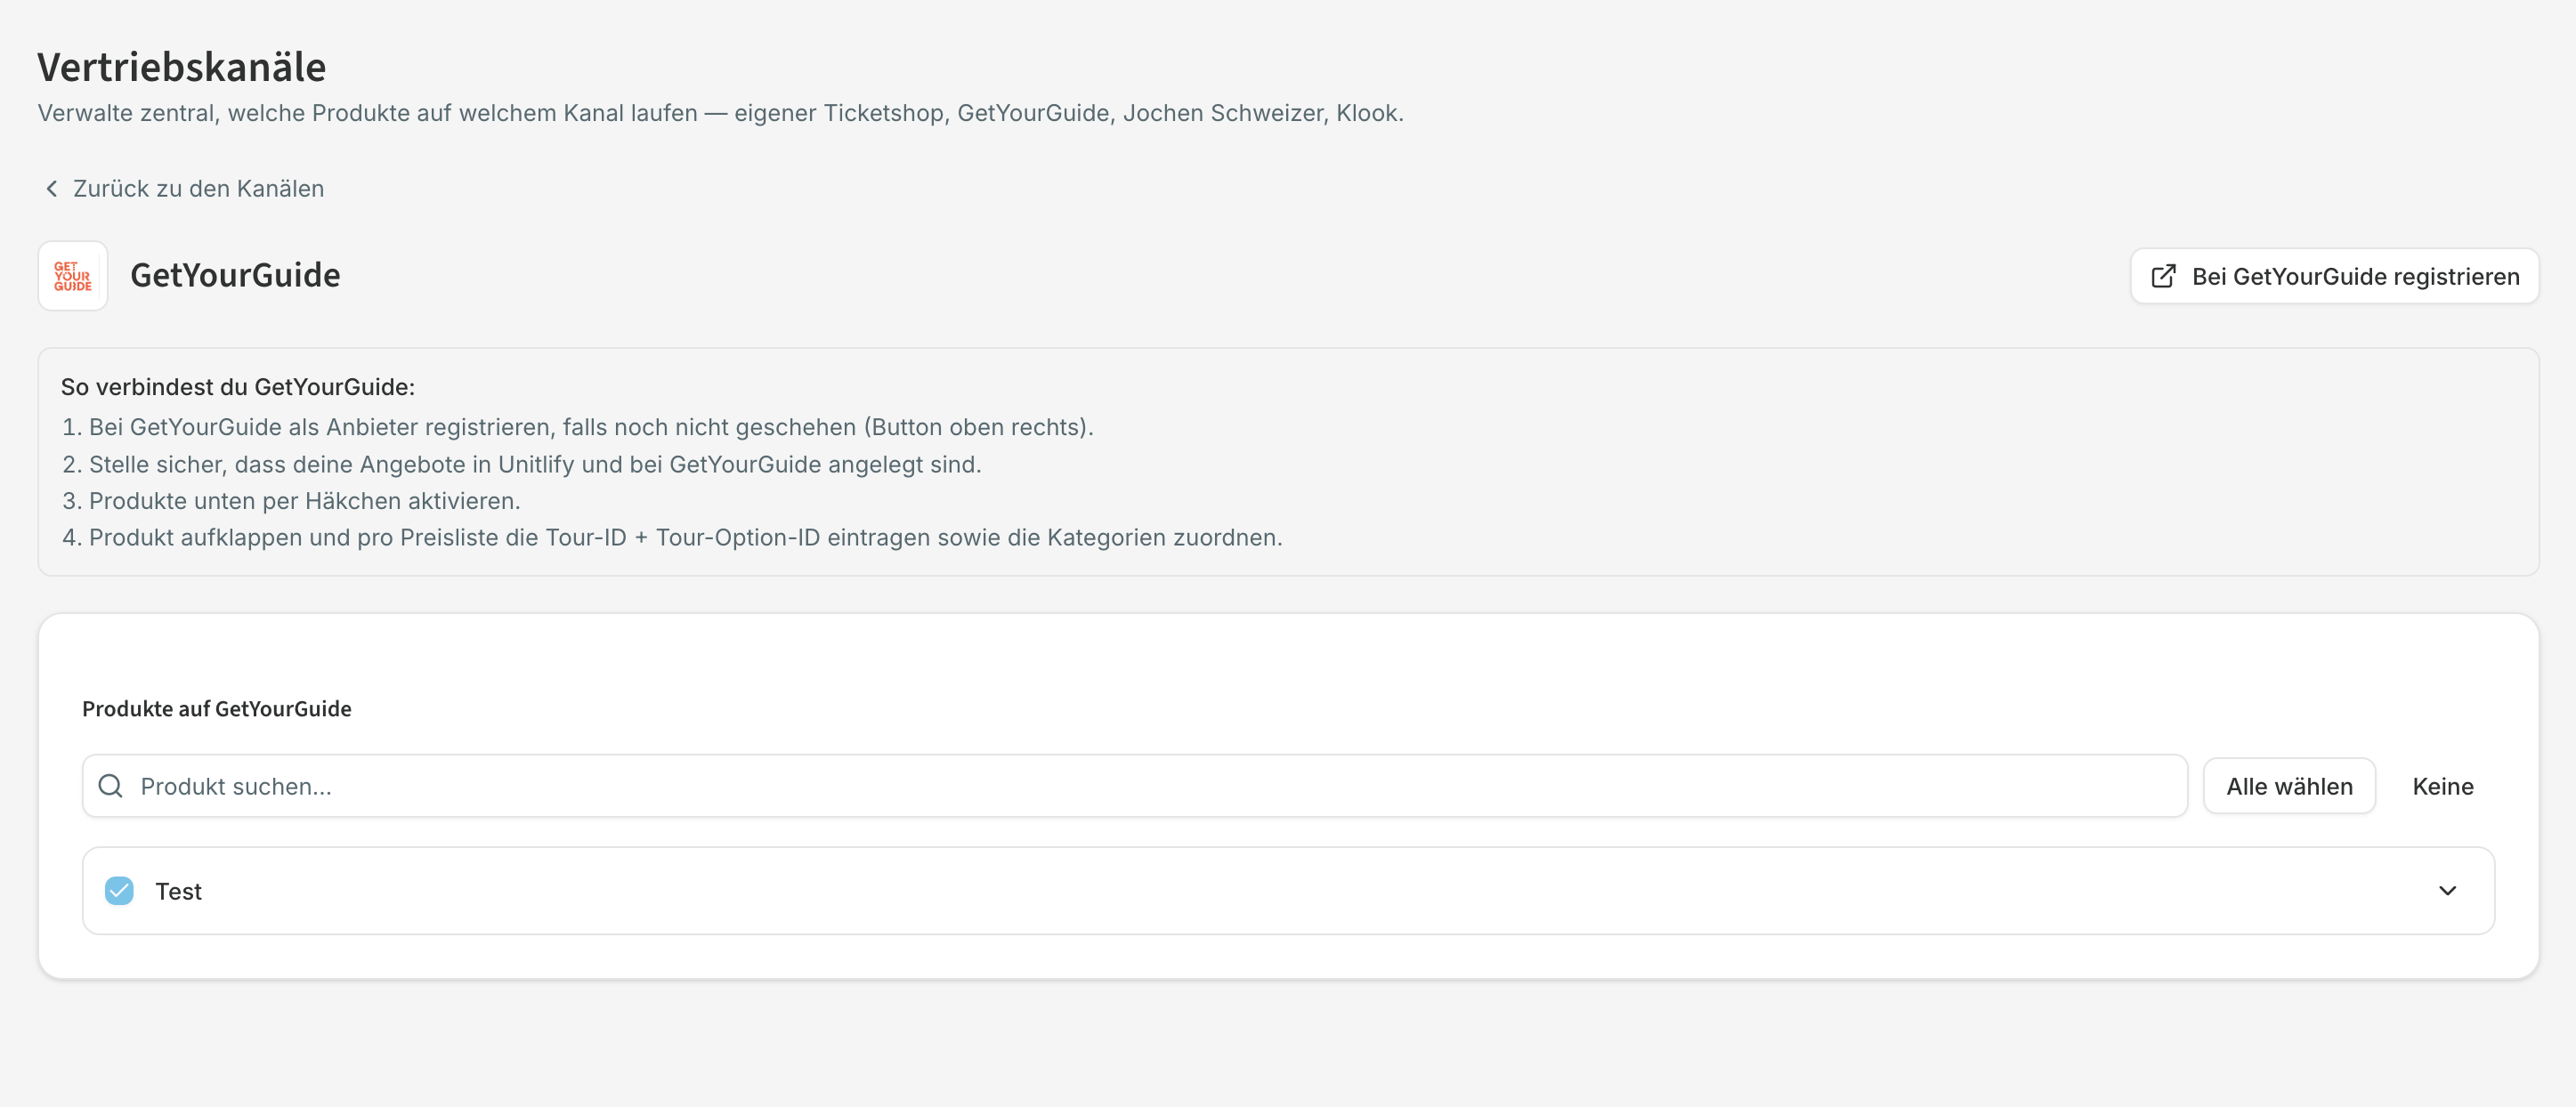
In the product list, tick the price lists you want to sell on GetYourGuide. Use the search field or Alle wählen for bulk selection, then save.
- 4
Enter your Tour IDs and map categories
Expand a product (arrow on the right). For each price list, paste the Tour ID and Tour Option ID you received from GetYourGuide, and assign each ticket category a matching GYG category from the dropdown, then save.
Example: „für 1 Person" →ADULT, „Paarlauf" →GROUP.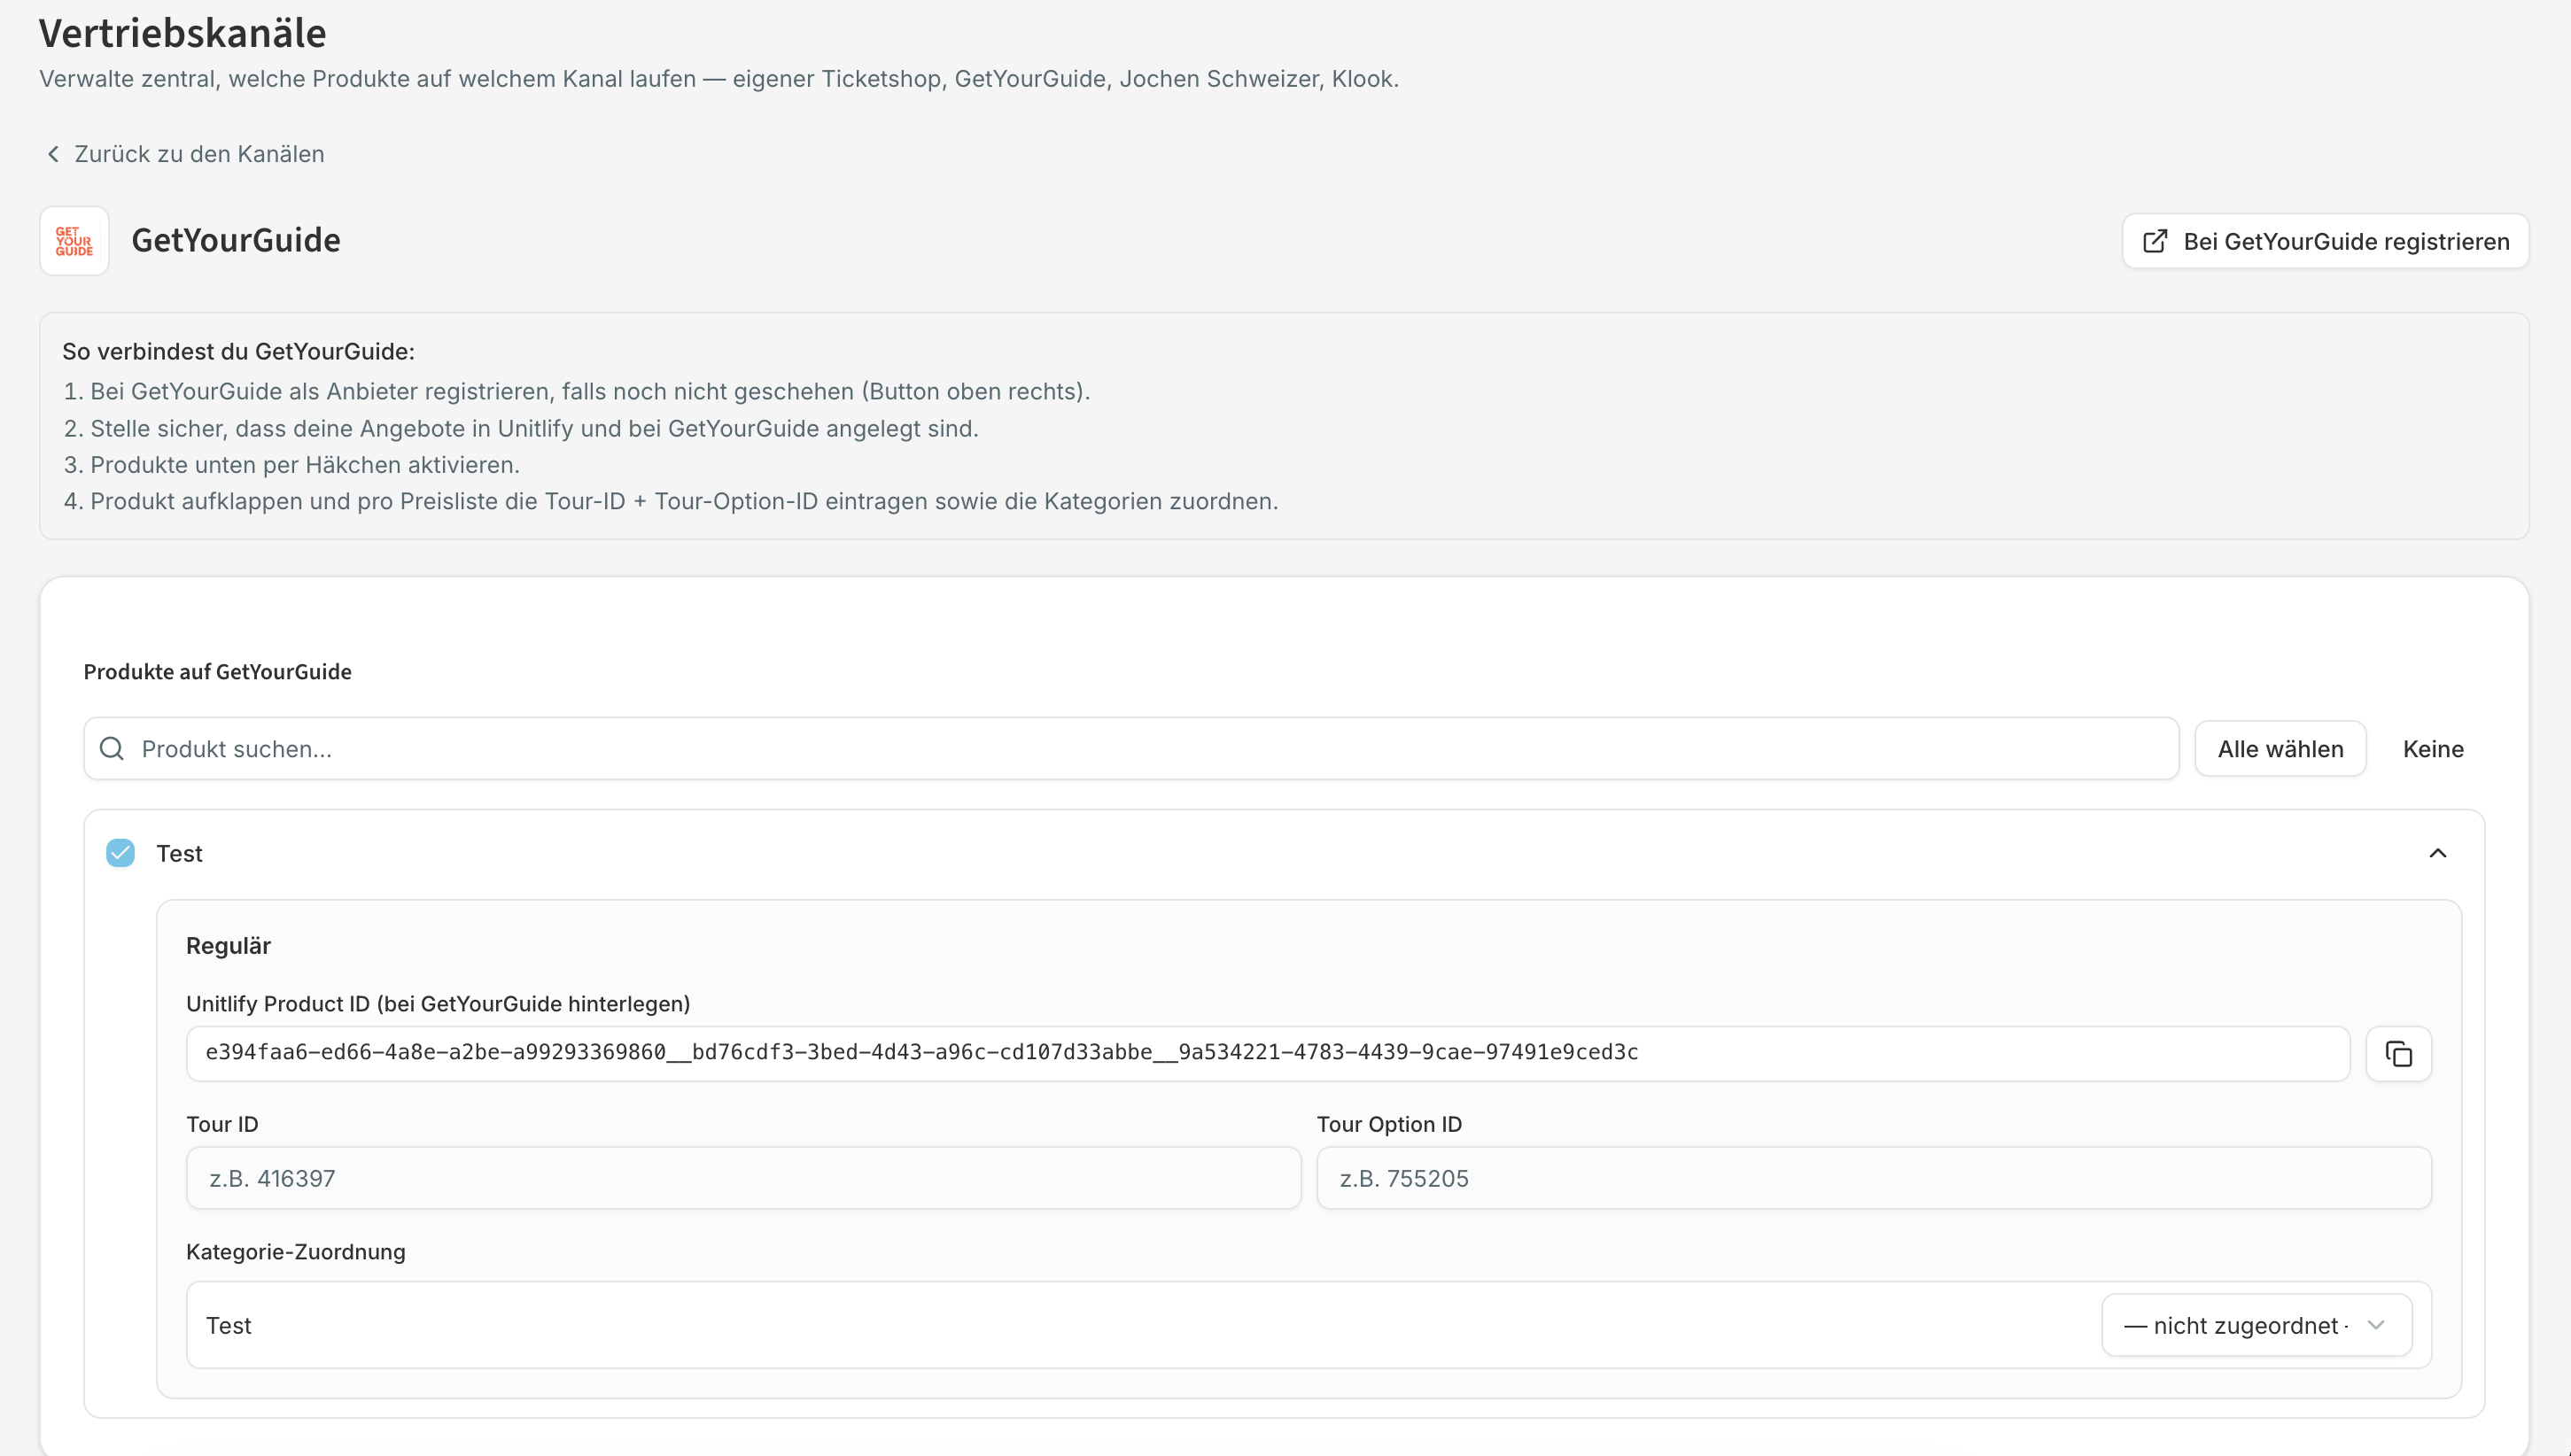
- 5
Copy your Unitlify Product ID
In the expanded price list you'll find the Unitlify Product ID. Click the copy button next to it.
- 6
Paste the Product ID in GetYourGuide
In your GetYourGuide Supplier Administration account, select Unitlify from the list of reservation systems and paste the Unitlify Product ID into the corresponding product.
Need help?
Our team is happy to help with your integration.